") Turkey (Türkçe)
Turkey (Türkçe)") Worldwide (English)
Worldwide (English)Making WordPress SMTP Mail Settings

You can easily start receiving e-mails from your website's contact forms by adjusting your WordPress SMTP e-mail settings. Follow the steps below to begin setting up STMP mail settings.
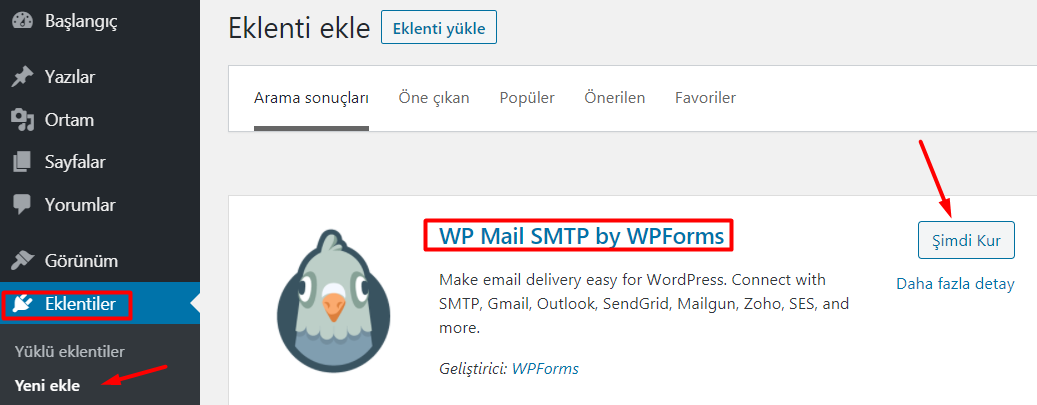
Step 1: Go to WordPress Admin Panel > Plugins > Add New and download the WP Mail SMTP by WPForms plugin.
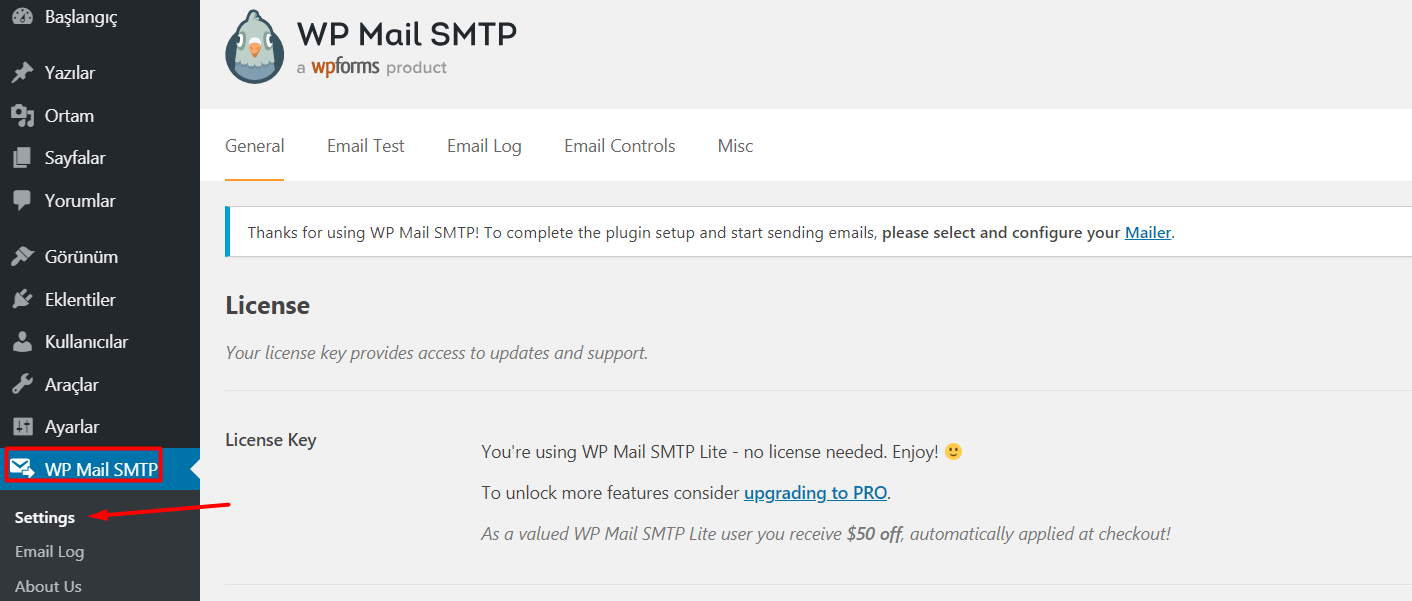
Step 2: After activating the WP Mail SMTP plugin, open the Administration Panel > WP Mail SMTP > Settings page.
Step 3: In the window that opens, edit the relevant fields according to your information.
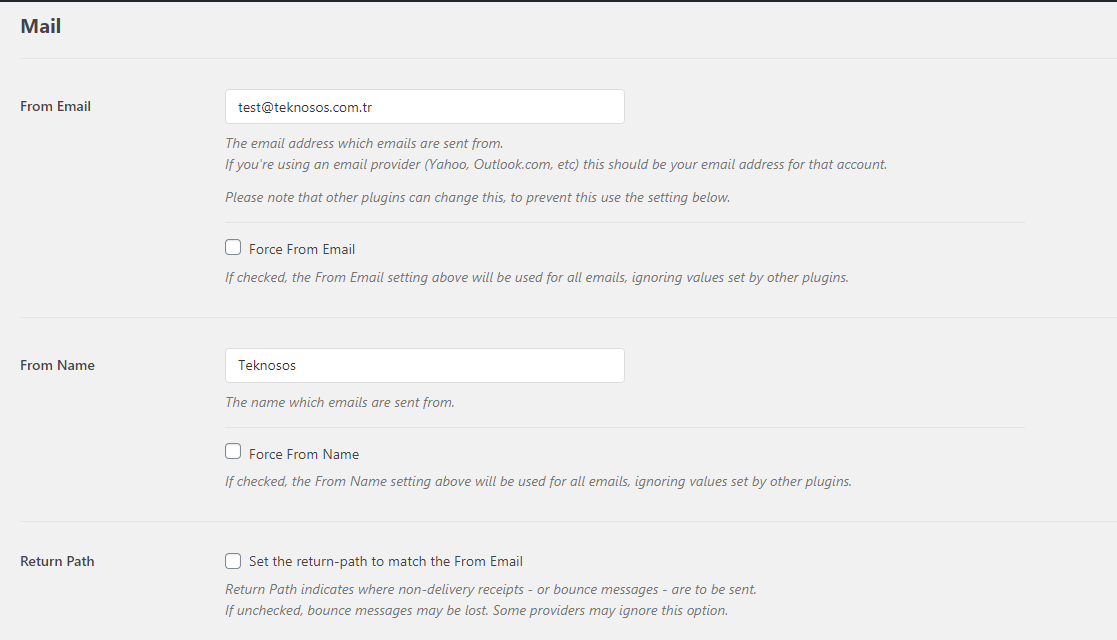
From Email: Type the email address from which the email will be sent. You can create an e-mail address such as [email protected] from your hosting company and use it only for these transactions. If you do not have a corporate e-mail address, you can also write e-mail addresses such as Outlook, Gmail, Yahoo, Hotmail.
From Name: Write the name from which the email will come.
Note: You can leave other settings as default.
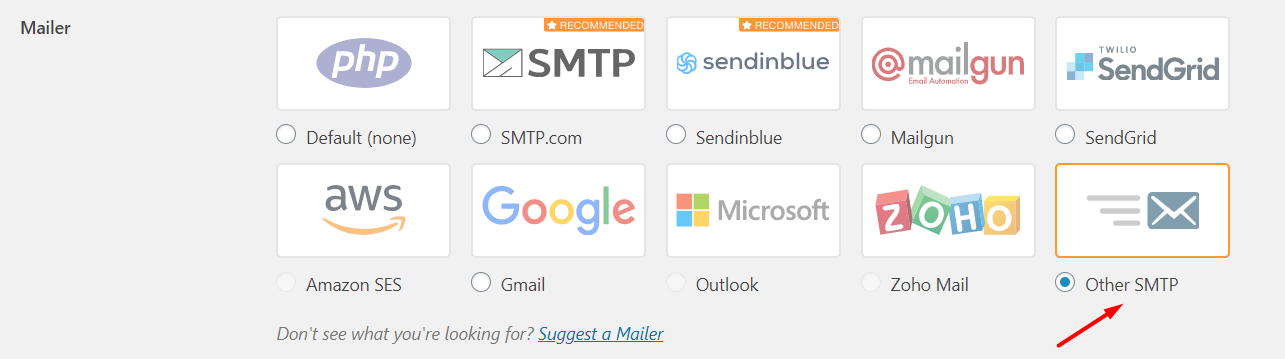
Step 4: In this step, we select the client from the mailer section where we will set our SMTP server settings.Select Other STMP.
Step 5: It's time to make our SMTP Host settings. Write your own information in the relevant sections as shown in the image below and then click the Save Settings button.
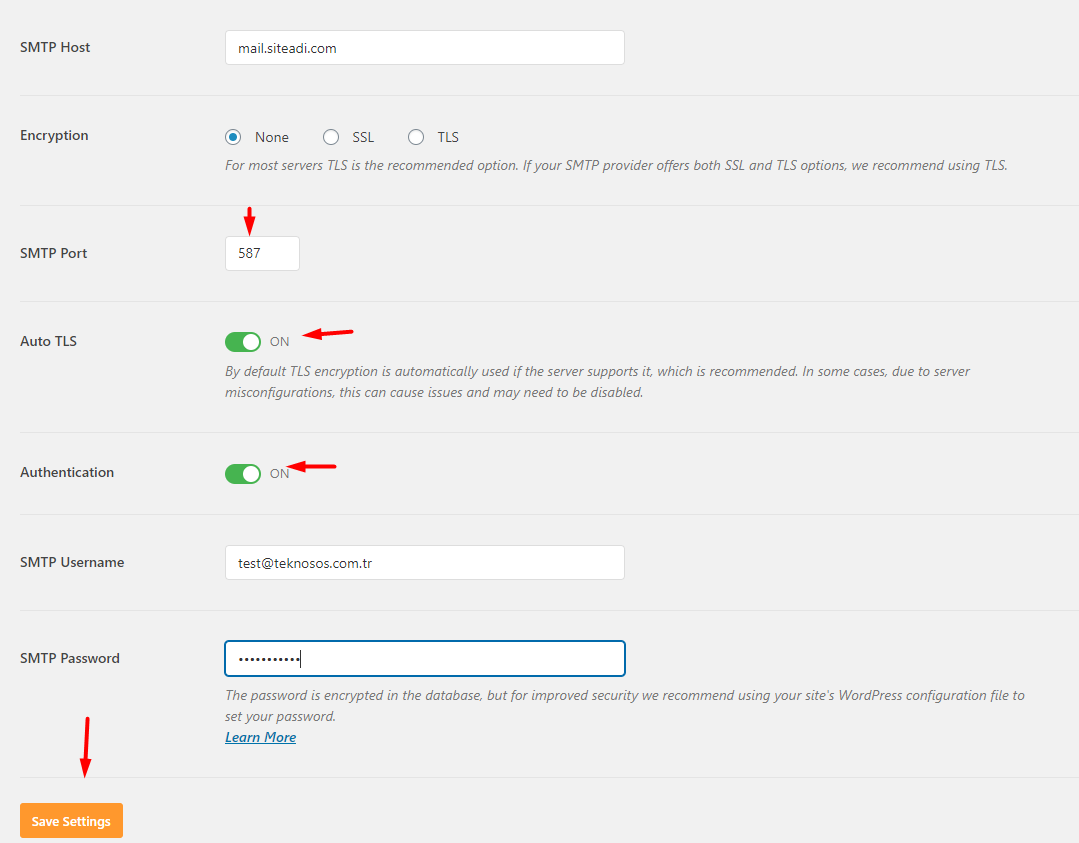
SMTP Host: mail.siteadi.com (If you are not setting up via corporate e-mail, type localhost.)
Encrytion: Check Encryption type to None. (If there is a problem, try again as TLS.)
SMTP Port: Must be 587.
Auto TLS: ON option must be activated. (In some cases, it may cause problems due to server misconfigurations and may need to be disabled.)
Authentication: Must be turned ON.
SMTP Username: Type your corporate e-mail address that you created via hosting.
SMTP Password: Type the password you chose for your corporate email.
We have successfully completed the WordPress SMTP settings. Now, to test our settings, we click on the Email Test field at the top.
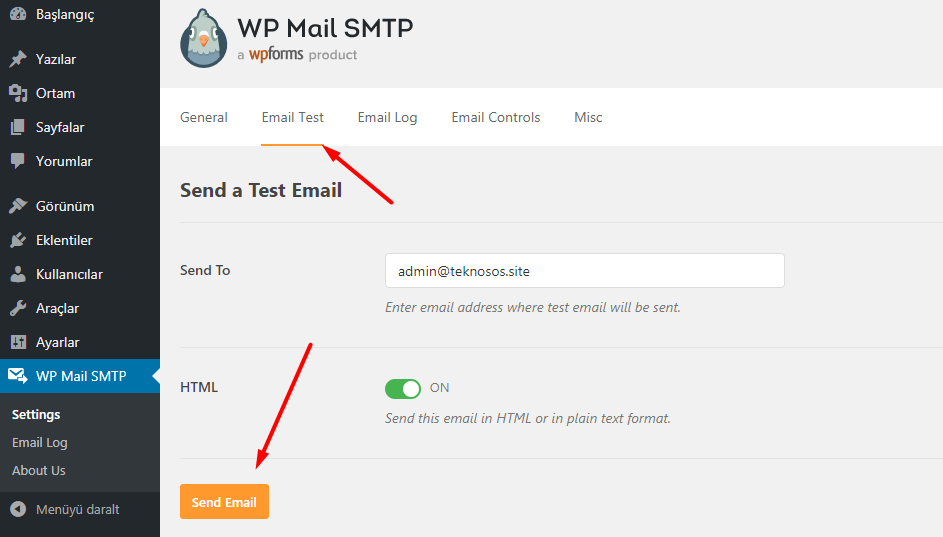
Add your e-mail address and click on the "Send Email" button and that's it. If there is a problem with your settings, review the Encrytion and Auto TLS sections again.
Can't find the information you're looking for?
You have examined the knowledge base in detail, but if you cannot find the information you need,
Create a Support Ticket-
How to Open Ports in Windows?
313 2
-
How to Grant Windows Administrator Privileges?
229 0
-
How to install Webmin on Ubuntu?
882 2
-
Linux SSH Terminal Commands and Explanations
799 3
-
CentOS Stream 10 Update Commands
858 1
-
CentOS Stream 9 Update Commands
1248 2
-
CentOS Stream 8 Update Commands
675 0
-
What is FreeBSD?
858 2
-
Out: 452 4.3.1 Insufficient system storage
768 2
-
Turning Off Automatic Updates in Windows Operating Systems
879 0