") Turkey (Türkçe)
Turkey (Türkçe)") Worldwide (English)
Worldwide (English)How to Set Up Yandex Corporate Mail

Using Yandex corporate mail, you can connect to your e-mails from e-mail clients on desktop and mobile devices. Companies generally prefer to set up Yandex corporate e-mail to use unlimited e-mail space. Your actions, such as deleting, filing or flagging an email or marking it as unread, are automatically synchronized between Yandex Connect corporate mail and other email programs that access the account using IMAP.
In this article, we will explain the steps to set up Yandex Connect corporate mail.
Yandex Connect 2020 Corporate Mail Setup:
Step: Before you can use Yandex Connet, create a Yandex mail account.

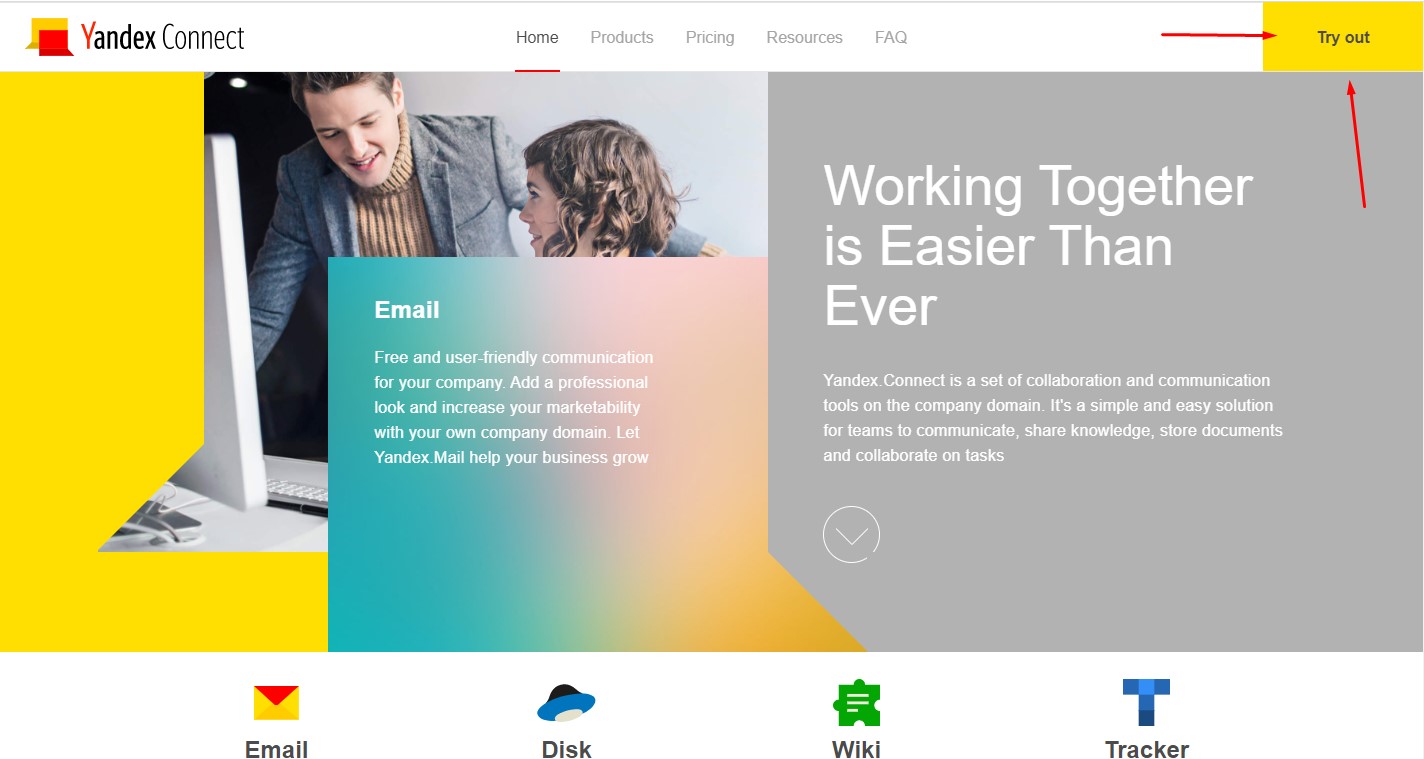
Step 2: After creating your Yandex mail account, go to the Yandex Connect page and log in by clicking the “Try out” button at the top right.
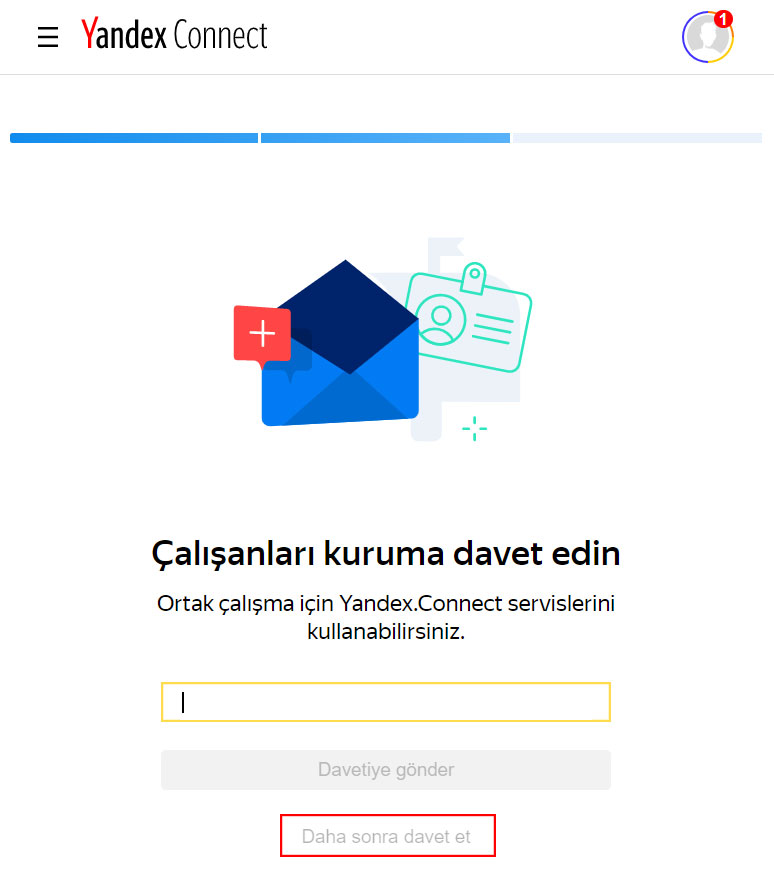
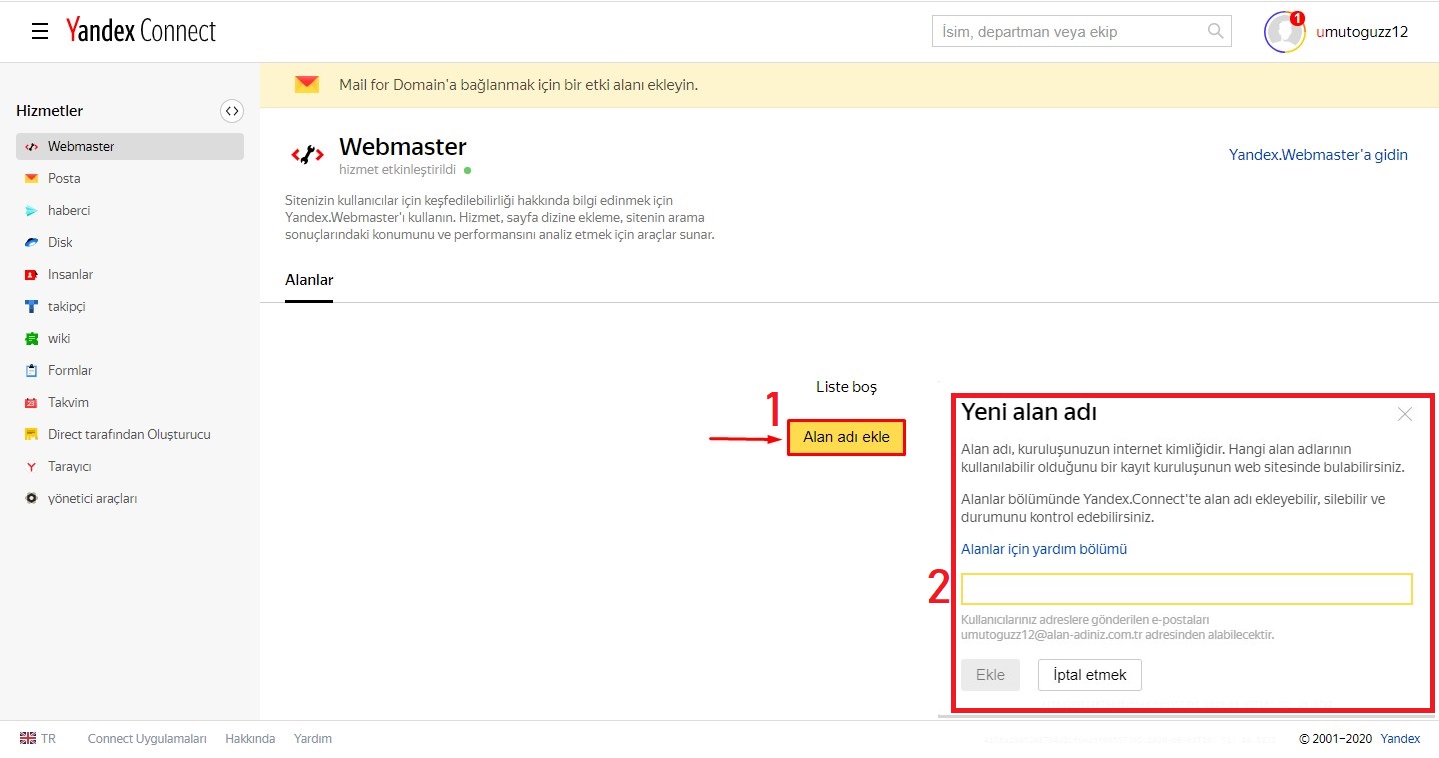
Step 3: In this step, add your employees or other users you want to authorize the account or click on the “invite later” button.
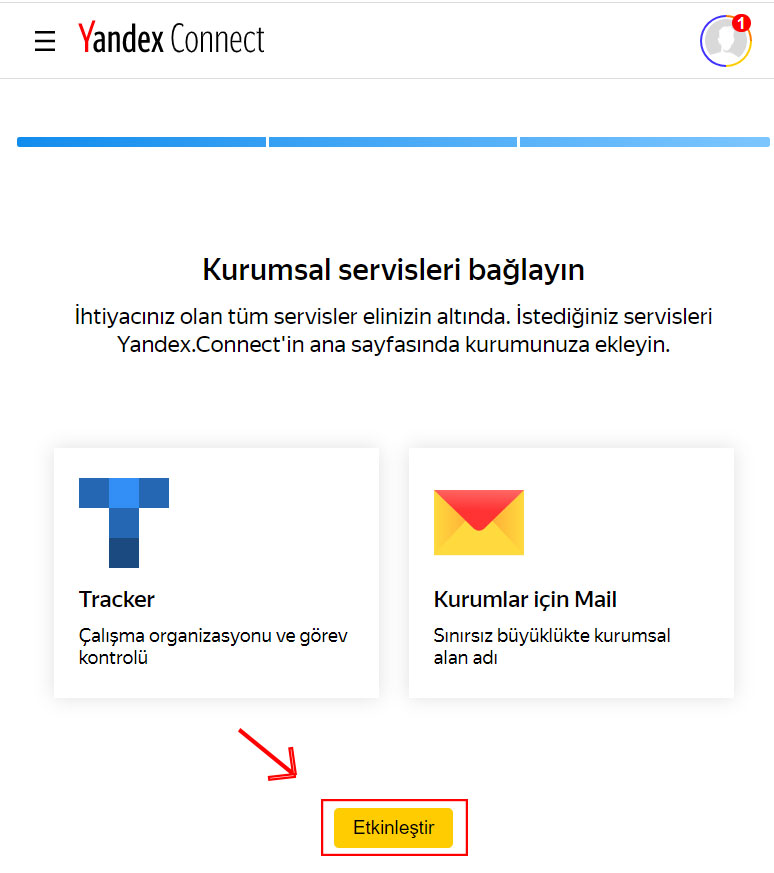
Step 4: In the new window that opens, click on the yellow “Enable” button at the bottom.
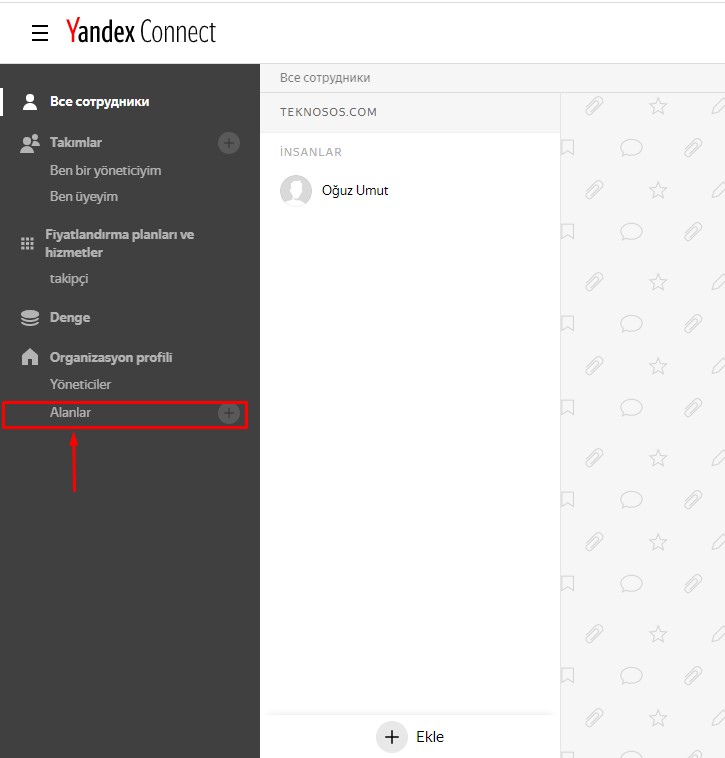
Step 5: In the new window that opens, click on the Management section at the bottom and open the administration panel.

Step 6: Click on the Domains section at the bottom of the admin panel and proceed to the next step.
Step 7: In this window that opens, click on the "Add domain" button on the "Webmaster" tab and then type your domain address where you will set up e-mail.
Step 8: In this step we need to verify the domain name.
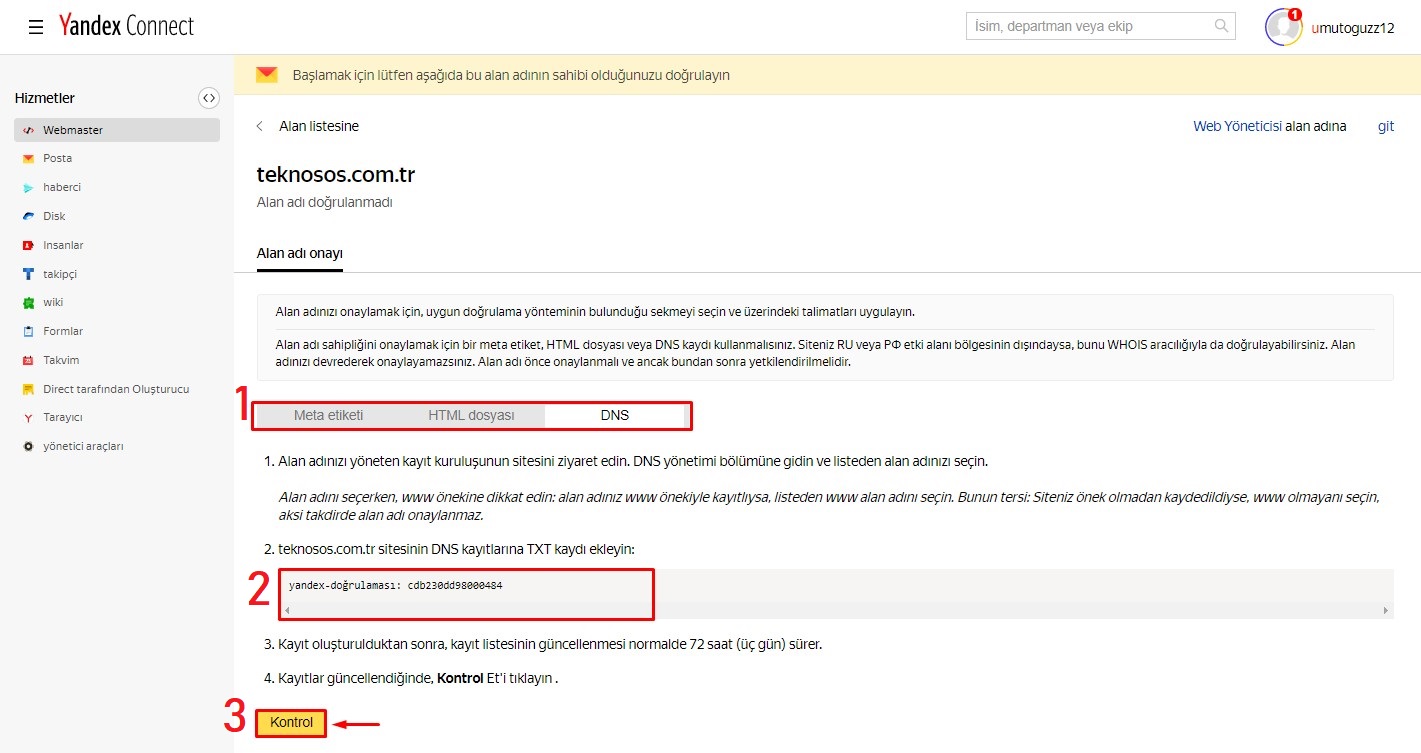
In the interface that opens, there are 4 different verification options to prove that we have domain name management. The easiest of these is the verification method with meta tags. Copy the relevant code and place it in the site source code section.
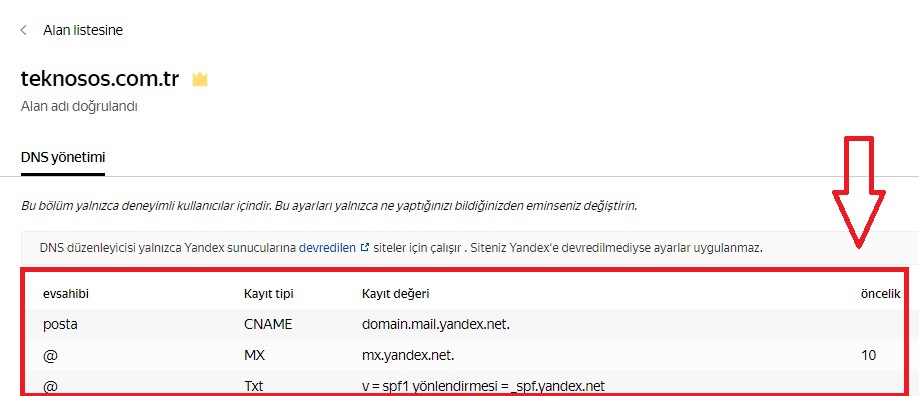
Step 9: The most important step in setting up Yandex corporate mail is to organize the MX records according to Yandex. In the image below, Yandex shows the sections it wants you to update in the DNS management section. Update MX and TXT from your domain or hosting Cpanel.
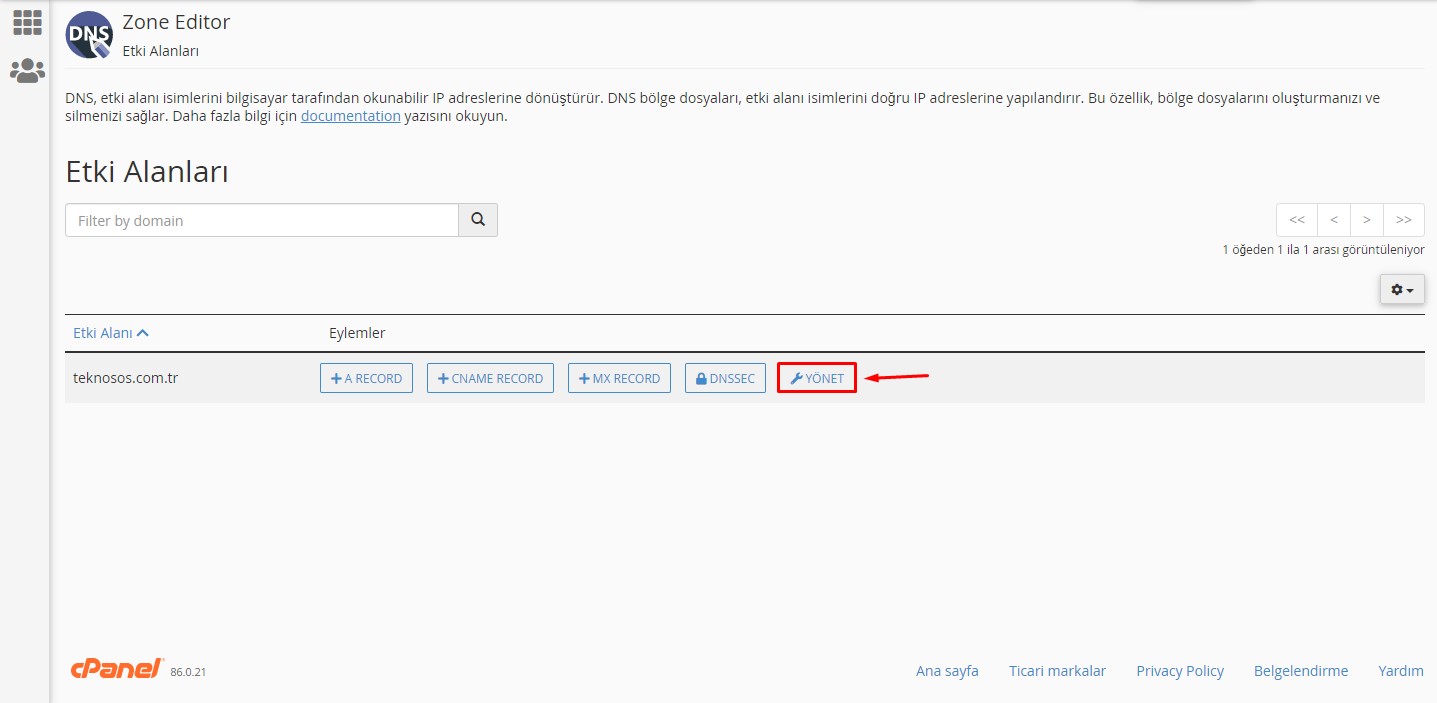
Step 10: Open Cpanel where your website is installed and click on the Zone Editor section.
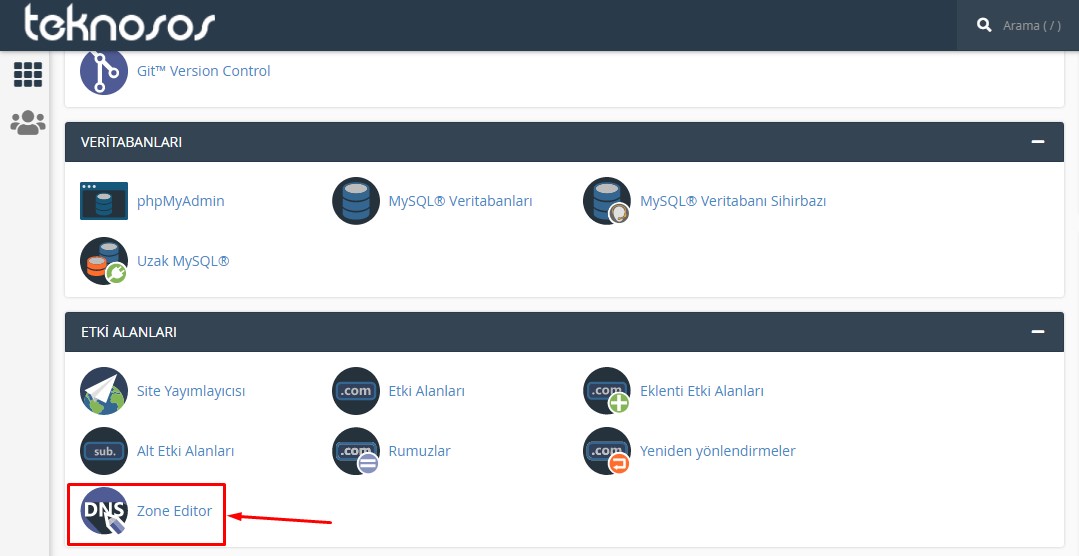
Step 11: Click the "Manage" button opposite the relevant domain in the window that opens.
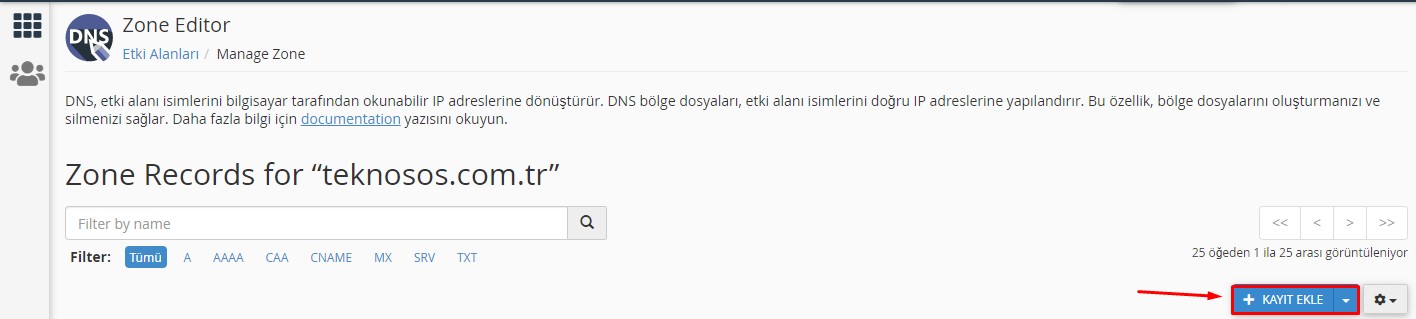
Step 12: In this tab we add MX record and TXT records. After clicking the add record button, make the settings as shown in the image below.
From the Type section: select “MX”.
Priority: Type “10”.
Target Location: Type mx.yandex.net and then click the “Add Record” button.
Step 13: After adding the MX record, it is time to create a TXT record for Yandex. Make the necessary settings as shown in the image below.

From the Type section: Select “TXT”.
Registration: Add “v=spf1 redirect=_spf.yandex.net” and click on the add registration button.
Note: If you already have an MX and TXT record in your Cpanel, click the edit button to update the existing record according to the information above, or delete the relevant records and add them again with updated information. After completing these steps, it typically takes up to (3 days) for newly created MX records to become valid. When you see the MX record verified warning in the domain name section of your Yandex connect panel, you can create and start using your e-mail addresses.
Step 14: Finally, enter the “Administration” panel shown in step 5. Then click on the first field in the left panel.

You can add Yandex corporate e-mail by adding the information of the people who will use the e-mail account one by one in the window that opens.
You can use the e-mails you have added by logging in via Yandex or you can use them via Outlook.
Can't find the information you're looking for?
You have examined the knowledge base in detail, but if you cannot find the information you need,
Create a Support Ticket-
How to Open Ports in Windows?
262 2
-
How to Grant Windows Administrator Privileges?
209 0
-
How to install Webmin on Ubuntu?
854 2
-
Linux SSH Terminal Commands and Explanations
755 3
-
CentOS Stream 10 Update Commands
816 1
-
CentOS Stream 9 Update Commands
1201 2
-
CentOS Stream 8 Update Commands
655 0
-
What is FreeBSD?
821 2
-
Out: 452 4.3.1 Insufficient system storage
742 2
-
Turning Off Automatic Updates in Windows Operating Systems
865 0