") Turkey (Türkçe)
Turkey (Türkçe)") Worldwide (English)
Worldwide (English)Centos 7 Cpanel Installation

Although Cpanel offers a higher license price compared to other paid panels, it is still the most used web hosting control panel and it seems that it will continue to be so for a long time. Today we will tell you how to install Cpanel on Centos 7.
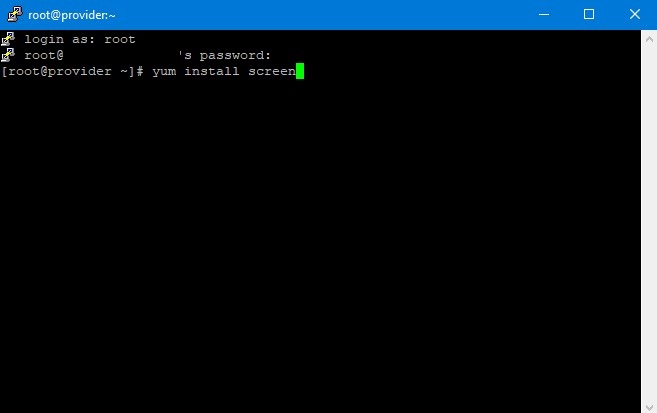
1-The screen command is used to ensure that a long process does not end even if the terminal closes. For this, we write the yum install screen command.
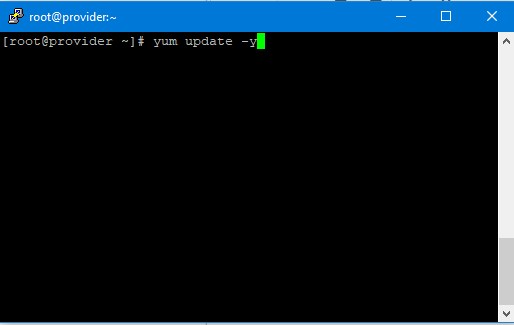
2-After installing the screen command, we update the server with the yum update -y command.
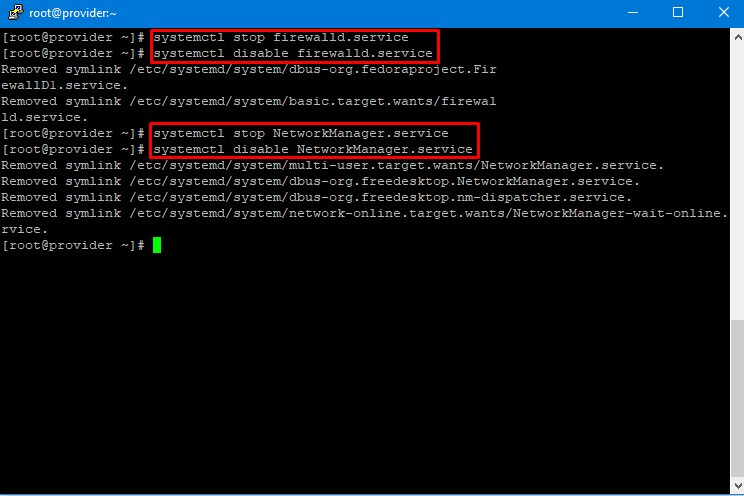
3-After the update is completed, type the following commands one by one.
systemctl stop firewalld.service
systemctl disable firewalld.service
systemctl stop NetworkManager.service
systemctl disable NetworkManager.service
systemctl disable NetworkManager.service
4-Now we will move on to the installation of Cpanel.
cd /home && curl -o latest -L https://securedownloads.cpanel.net/latest && sh latest
We will start the cpanel installation by running this command.
After the installation is completed:
systemctl start NetworkManager.service
systemctl enable NetworkManager.service
We will reboot the server by typing the above commands and typing reboot on the server.
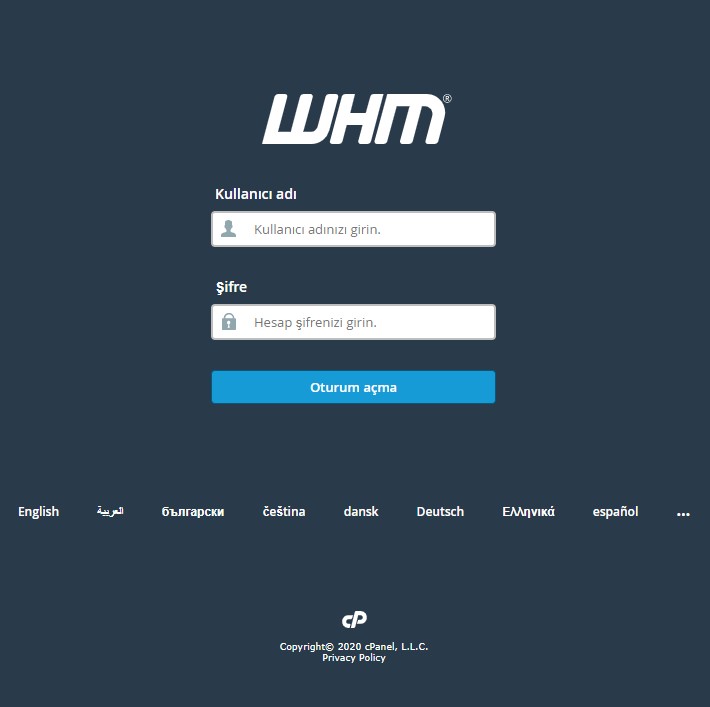
After rebooting, you can log in to Cpanel using https://your-ipaddress:2087.
Your username and password are the same as your server information.
Can't find the information you're looking for?
You have examined the knowledge base in detail, but if you cannot find the information you need,
Create a Support Ticket-
How to Open Ports in Windows?
320 2
-
How to Grant Windows Administrator Privileges?
235 0
-
How to install Webmin on Ubuntu?
891 2
-
Linux SSH Terminal Commands and Explanations
809 3
-
CentOS Stream 10 Update Commands
865 1
-
CentOS Stream 9 Update Commands
1258 2
-
CentOS Stream 8 Update Commands
683 0
-
What is FreeBSD?
863 2
-
Out: 452 4.3.1 Insufficient system storage
772 2
-
Turning Off Automatic Updates in Windows Operating Systems
881 0